


Deploy Streamlit App on AWS EC2 instance
I’ve always been a firm believer in the philosophy of continuous learning. The world of technology, especially in the realm of data science…

I’ve always been a firm believer in the philosophy of continuous learning. The world of technology, especially in the realm of data science and machine learning, is evolving at a breakneck pace. To stay relevant, one must be constantly curious, exploring new tools, techniques, and platforms. For me, this personally means upskilling myself with knowledge of deployment of ML models to cloud and MLOps best practices.
Learning by doing has been a very effective approach for me so long. Theoretical knowledge is essential, but it’s only through practical application that we truly grasp the nuances of a subject. So, when I decided to learn more about productionizing ML models, I knew that the best way to learn was build something hands-on based on my personal interests.
I follow the stock market closely and in the past, I have infact written python code that helps me calculate instrinsic value of SP500 stocks. So to make my learning more fun, I decided to start small and build a Streamlit app that helps calculate intrinsic value of SP500 stocks and deploy it using AWS EC2. This project would not only allow me to solidify my understanding of cloud infrastructure but also serve as a stepping stone towards mastering MLOps. I am thrilled to share my first success of deploying apps to the cloud, and making them accessible to a wider audience. In this article, I would like to share the step by step process on how I did it.
Pre-requisites
GitHub repo with your Streamlit app
Free Tier AWS Account
You can find the link to my repo used in this example below https://github.com/ArunSubramanian456/valuation_streamlit_app
Step by Step Process
STEP 1 — Launch a EC2 Instance
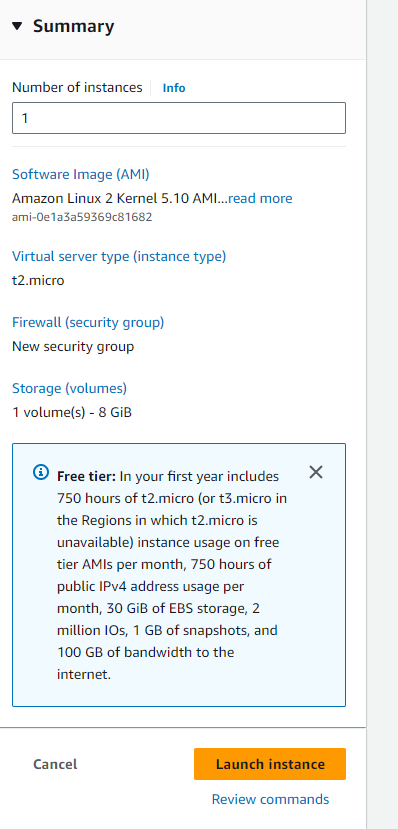
Launch a AWS EC2 Instance with the following config:
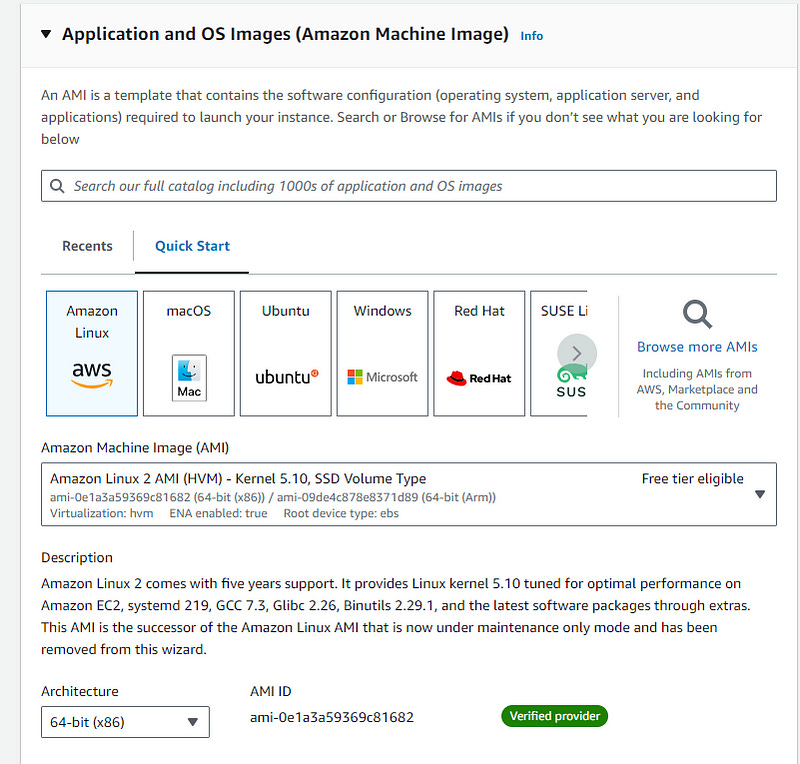
AMI — Amazon Linux 2 (Free tier eligible)
Instance Type — t2.micro (Free tier eligible)
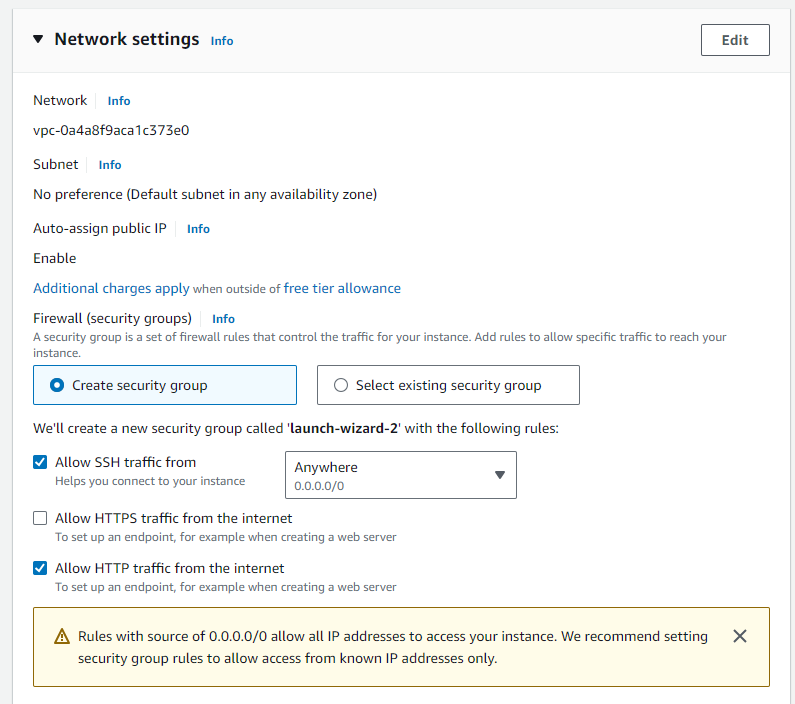
Network settings — Allow SSH, HTTP, HTTPS
Storage — Default
1a. Go to EC2 in AWS Console

1b. Launch instance

1c. Select AMI
Amazon Linux 2 comes with Python3 installed already.
1d. Select Instance type

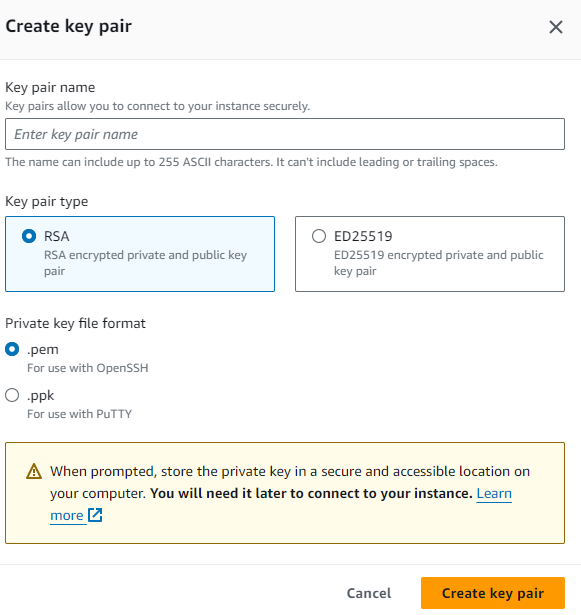
1e. Create key pair for programmatic authentication
Once you click “Create” button, it will ask you to download a .pem file. Download it and keep it in your local machine.
1f. Setup Network settings to allow HTTP and HTTPS
1g. Review summary and launch instance
STEP 2 — Update Inbound Rules for Security Group
Streamlit uses port 8501 by default to launch the app. Hence, you need to add this port as Custom TCP in Security Group -> Inbound Rules.
2a. Navigate to newly launched instance and go to Security tab
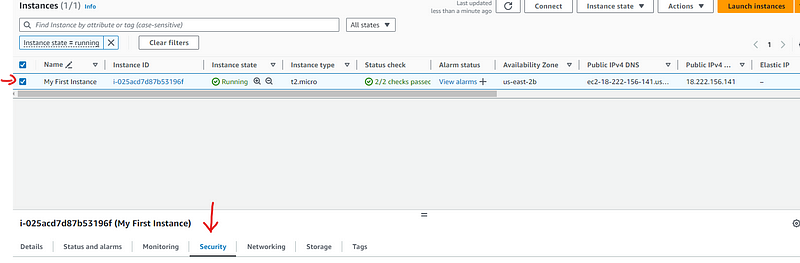
2b. Update Inbound Rules to allow access to port 8501 used by Streamlit

STEP 3— Login to EC2 Instance
3a. Open Command Prompt from the folder where you saved your key-pair (.pem file)
3b. Establish SSH connection and log into the EC2 instance
Run the below code
SSH -i our_streamlit_key.pem ec2-user@{Public IPv4 DNS}Public IPv4 address can be found when you select the launched instance in console

You would see the below screen in command prompt. Note how you are into the EC2 server now.

3c. Install git in the EC2 instance
Run the below code
sudo yum install gitSTEP 4— Launch the App
4a. git clone repo into EC2 instance
Run the below code to clone the repo into the EC2 instance
git clone https://github.com/ArunSubramanian456/valuation_streamlit_app.git4b. Launch Streamlit App
Run the below code to launch the app from within the repo folder copied.
streamlit run app.py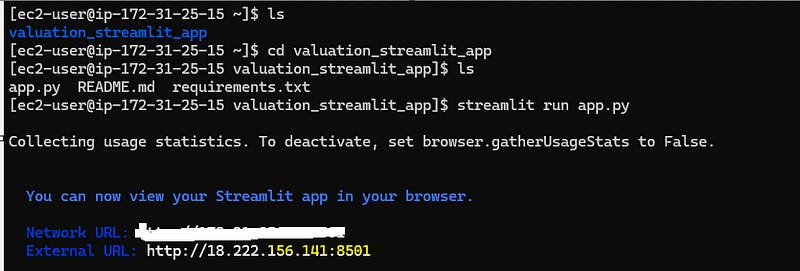
In case, you want to let the app running while you exit the command prompt instance, you can use a terminal multiplexer like tmux. This is required if you want to share the external link with others to showcase your work.
Run the below code to install tmux in your EC2 instance
sudo yum install tmuxCreate a new tmux instance and provide it a name
tmux new -s <session_name>Launch Streamlit app from within this new tmux instance
streamlit run app.pyYou can then detach yourself from the instance by pressing CTRL+B and then D. Once you are detached, exit the command prompt however the app will keep running in the backend.
To attach back, run the below code with session_name you created.
tmux attach-session -t <session_name>Finally, it is time to have some fun.
Using the External URL, you can now open the app in any browser and start playing with it.
Here are few stock valuations I tried to calculate using the discounted cash flow model (DCF). Disclaimer — stock valuations calculated by this Streamlit app are based on a simplified discounted cash flow (DCF) model and should not be considered as accurate estimates or financial advice. Always consult with a qualified financial advisor before making any investment decisions :)


