


A Beginner's Guide to LangGraph
Dive into LangGraph and discover how it revolutionizes multi-agent workflow with its flexible, stateful, graph-based orchestration


Introduction
You've likely seen the power of LangChain, building cool LLM apps with its diverse tools. But what happens when you want to orchestrate complex agent interactions? That's where LangChain can start to feel limiting. Its sequential workflows struggle with intricate logic, multi-agent collaboration, and maintaining state over extended conversations.
Ready for a solution? This post introduces LangGraph, a framework designed for building controllable agents. We'll explore how LangGraph gives you finer-grained control, unlocking a new level of sophistication in your AI projects. By the end, you'll grasp the fundamentals and even build a simple chatbot!
Note - For those seeking to build the chatbot using LangGraph themselves after reading the post, you can find the complete code in this GitHub repo.
About the Authors:
Arun Subramanian: Arun is an Associate Principal of Analytics & Insights at Amazon Ads, where he leads development and deployment of innovative insights to optimize advertising performance at scale. He has over 12 years of experience and is skilled in crafting strategic analytics roadmap, nurturing talent, collaborating with cross-functional teams, and communicating complex insights to diverse stakeholders.
Manisha Arora: Manisha is a Data Science Lead at Google Ads, where she leads the Measurement & Incrementality vertical across Search, YouTube, and Shopping. She has 12 years experience in enabling data-driven decision making for product growth. Manisha is the founder of PrepVector that aims to democratize data science through knowledge sharing, structured courses, and community building.
Why LangGraph is a Game-Changer?
LangChain excels at creating multi-step language workflows, and it's great for many tasks. However, when you move beyond those workflows to orchestrating complex agent systems, it faces some challenges. LangChain's strength lies in linear chains, but this structure makes it difficult to manage conditional logic between agents or maintain shared memory across them. This becomes a significant bottleneck when building applications that require agents to truly collaborate and build on each other's work.
LangGraph, on the other hand, is purpose-built for stateful, multi-agent orchestration. It uses a graph structure, giving you an explicit way to define agent interactions and control the flow of information. Think of it as a visual map for your agents! This graph-based approach lets you easily implement branching logic and manage information sharing through a central state. This shared state is crucial for collaborative tasks, enabling agents to work together seamlessly.
In summary, while LangChain is a powerful general-purpose framework for LLM applications, LangGraph is specifically engineered for the complexities of agent orchestration. As agent-based applications become more intricate, LangGraph offers a more suitable foundation for managing their complexity.
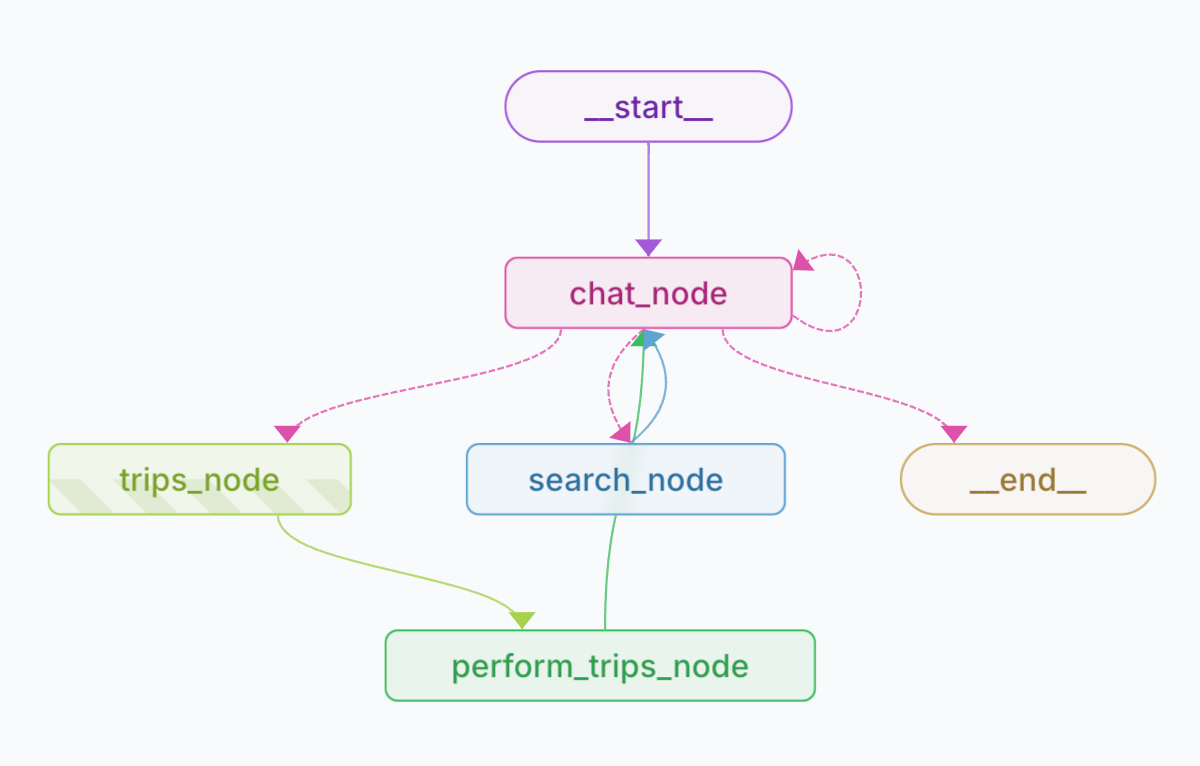
Reference Image - https://www.copilotkit.ai/blog/build-full-stack-apps-with-langgraph-and-copilotkit
Pre-requisites
Before we jump into LangGraph, let's quickly cover essential concepts - some basic OOP concepts and a quick introduction of Pydantic. You’ll need to know these
OOP Basics
Class: Think of a class as a blueprint. Imagine you're designing cars. The class defines what every car has (e.g. color, model) and what it can do (e.g. start, accelerate)
Objects: An object is an actual car built from that blueprint. So, a red Camry is an object of the "Car" class.
Methods: They are the actions a car can take, like
start()oraccelerate()Inheritance: is like passing down traits. A "SportsCar" class can inherit everything from the "Car" class and then add its own features, like a turbo boost
# Create a class
class Car:
    # Attributes
    def __init__(self, color, model):
        self.color = color
        self.model = model

    # Methods
    def start(self):
        print(f"The {self.color} {self.model} is starting.")

    def accelerate(self):
        print(f"The {self.color} {self.model} is accelerating.")

# Initialize Objects
my_car = Car("red", "Camry")
another_car = Car("blue", "Mustang")

# Test methods
my_car.start() # output - The red Camry is starting
another_car.accelerate() # output - The blue Mustang is accelerating

# Create another class with Inheritance
class SportsCar(Car):  # SportsCar inherits from Car
    def __init__(self, color, model, turbo):
        super().__init__(color, model)  # Call the parent class's constructor
        self.turbo = turbo

    def boost(self):
        if self.turbo:
            print("Initiating turbo boost!")
        else:
            print("No turbo available.")

# Test own and inherited methods
my_sports_car = SportsCar("yellow", "Supra", True)
my_sports_car.start()   # Inherited from Car
my_sports_car.boost()   # Specific to SportsCar
Pydantic for Data Validation
Ever needed to validate user input, like making sure an age is a number or an email is valid? That's data validation, and it's super important. Pydantic helps you do this in Python. You define your data structure using classes with type hints, and Pydantic makes sure the data fits the mold. This prevents errors and keeps your application running smoothly.
from pydantic import BaseModel

# Define a User Model inheriting the characteristics of BaseModel
class User(BaseModel):
    name: str
    email: str
    age: int
    is_active: bool = False  # Default value

# Run validation
## Validation example 1
user_data_valid = {"name": "Alice", "email": "alice@example.com", "age": 30}
user_valid = User(**user_data_valid)
print(user_valid)
print(user_valid.age)

# output - name='Alice' email='alice@example.com' age=30 is_active=False

## Validation example 2
user_data_invalid = {"name": "Bob", "email": "bob@", "age": "twenty"}
try:
    user_invalid = User(**user_data_invalid)
except Exception as e:
    print(e)

# output
# 1 validation error for User
# age
# Input should be a valid integer, unable to parse string as an integer
# [type=int_parsing, input_value='twenty', input_type=str]
LangGraph Architecture
LangGraph's architecture is built around a few core components:
StateGraph: This is the heart of LangGraph. It's how you structure your application's flow, like a map guiding your agents.
Nodes: These are the individual steps in your workflow. A node could be an agent making a decision, an LLM generating text, a tool being used, or even just a Python function.
Edges: These are the connections between nodes, showing how the workflow moves from one step to the next. You can have simple edges that always go to the same next step, or conditional edges that choose the next step based on the current state.
State: This is a central place where all the information is stored and shared between nodes. It uses Pydantic to make sure the data is consistent and accurate.
Compilation: Once you've defined your graph, you "compile" it to make it ready to run.
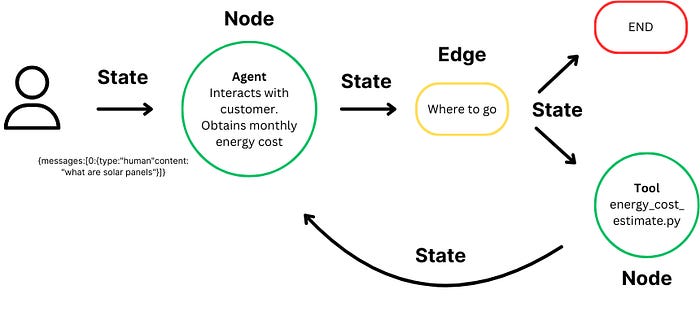
Reference image - https://medium.com/@lorevanoudenhove/how-to-build-ai-agents-with-langgraph-a-step-by-step-guide-5d84d9c7e832
Let’s build a Chatbot
Okay, let's get our hands dirty and build a super simple chatbot with LangGraph! The below code establishes a basic LangGraph workflow for a simple chatbot. It defines a State dictionary to hold the conversation history as a list of messages, utilizing Annotated with add_messages for automatic message appending. The workflow consists of a single node, "chatbot," which takes the current state, invokes an LLM with the message history to get a response, and returns the response to be added to the state. The graph is then built with the "chatbot" node connected from the START and leading to the END, and finally compiled into a runnable object, ready to process conversational turns. You can also visualize the graph using the get_graph method and one of the "draw" methods, like draw_png.
from typing import Annotated, TypedDict
from langgraph.graph import StateGraph, START, END
from langgraph.graph.message import add_messages

class State(TypedDict):
    # {"messages": ["your message"]}
    messages: Annotated[list, add_messages]

def chatbot(state: State):
    response = llm.invoke(state["messages"])
    return {"messages": [response]}

graph_builder = StateGraph(State)
graph_builder.add_node("chatbot", chatbot)

graph_builder.add_edge(START, "chatbot")
graph_builder.add_edge("chatbot", END)

graph = graph_builder.compile()

from IPython.display import display, Image

display(Image(graph.get_graph().draw_mermaid_png())) # Visualize the graph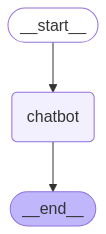
Now let's run the chatbot! You can exit the chat loop at any time by typing "quit", "exit", or "q".
while True:
user_input = input("You: ")
if user_input in ['q', 'quit', 'exit']:
print("Bye!")
break
response = graph.invoke({"messages": [user_input]})
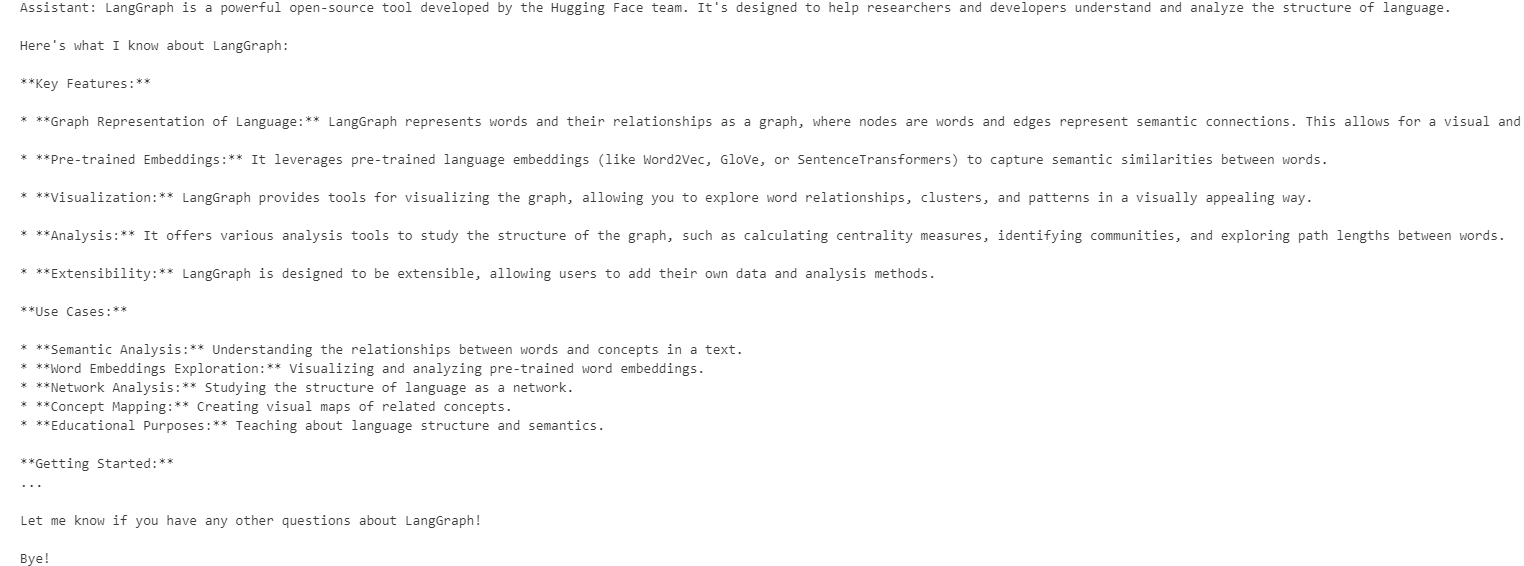
print("Assistant:", response["messages"][-1].content)I asked the chatbot “What do you know about LangGraph?” And below is its response.
Conclusion
Congratulations! You've built your first chatbot using LangGraph. This bot can engage in basic conversation by taking user input and generating responses using an LLM. You can inspect a LangSmith Trace for the call above. However, you may have noticed that the bot's knowledge is limited to what's in its training data. In the next blog, we'll add a web search tool and memory to expand the bot's knowledge and make it more capable. And soon, we are going to quickly jump into one of the most valuable use-cases, “Text to SQL” !
 | A guest post by
|